Django Channels websocket 搭建实践(实现长链接消息通知功能)
需求目的
消息实时推送消息以及通知功能、聊天室等功能
参考资料
- https://channels.readthedocs.io/en/latest/installation.html(安装)
- https://channels.readthedocs.io/en/latest/deploying.html( daphne + nginx 启动部署)
- https://blog.starmeow.cn/detail/9cfdf10e8fc047a44b08ed031e1f0ed1/(搭建)
开发环境
- windows 10 开发(centos 7 部署)
- python 3.6.8
- Django 2.2
channels 安装
pip install -U channels -i https://pypi.tuna.tsinghua.edu.cn/simple
channels 安装到 INSTALLED_APPS
# settings.py
INSTALLED_APPS = [
    'django.contrib.auth',
    'django.contrib.contenttypes',
    'django.contrib.sessions',
    'django.contrib.sites',
    ...
    'channels',  # pip install -U channels -i https://pypi.tuna.tsinghua.edu.cn/simple
]
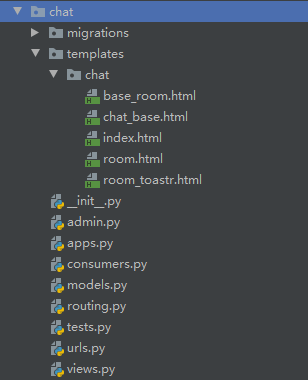
新建 chat app
python manage.py startapp chat
chat 配置 views INSTALLED_APPS
INSTALLED_APPS = [
    'django.contrib.auth',
    'django.contrib.contenttypes',
    'django.contrib.sessions',
    'django.contrib.sites',
    ...
    'channels',  # pip install -U channels -i https://pypi.tuna.tsinghua.edu.cn/simple
    'chat',
]
chat 配置 views.py
# chat/views.py
from django.shortcuts import render

def index(request):
    return render(request, 'chat/index.html')

def room(request, room_name):
    return render(request, 'chat/room.html', {
        'room_name': room_name
    })
# chat/templates/chat/index.html
<!-- chat/templates/chat/index.html -->
<!DOCTYPE html>
<html>
<head>
    <meta charset="utf-8"/>
    <title>Chat Rooms</title>
</head>
<body>
    What chat room would you like to enter?<br>
    <input id="room-name-input" type="text" size="100"><br>
    <input id="room-name-submit" type="button" value="Enter">

    <script>
        document.querySelector('#room-name-input').focus();
        document.querySelector('#room-name-input').onkeyup = function(e) {
            if (e.keyCode === 13) {  // enter, return
                document.querySelector('#room-name-submit').click();
            }
        };

        document.querySelector('#room-name-submit').onclick = function(e) {
            var roomName = document.querySelector('#room-name-input').value;
            window.location.pathname = '/chat/' + roomName + '/';
        };
    </script>
</body>
</html>
# chat/templates/chat/room.html
<!-- chat/templates/chat/room.html -->
<!DOCTYPE html>
<html>
<head>
    <meta charset="utf-8"/>
    <title>Chat Room</title>
</head>
<body>
    <textarea id="chat-log" cols="100" rows="20"></textarea><br>
    <input id="chat-message-input" type="text" size="100"><br>
    <input id="chat-message-submit" type="button" value="Send">
    {{ room_name|json_script:"room-name" }}
    <script>
        const roomName = JSON.parse(document.getElementById('room-name').textContent);

        const roomName = JSON.parse(document.getElementById('room-name').textContent);
        let ws_scheme = window.location.protocol === "https:" ? "wss" : "ws";
        const chatSocket = new WebSocket(
            ws_scheme
            + '://'
            + window.location.host
            + '/ws/chat/'
            + roomName
            + '/'
        );

        chatSocket.onmessage = function(e) {
            const data = JSON.parse(e.data);
            document.querySelector('#chat-log').value += (data.message + '\n');
        };

        chatSocket.onclose = function(e) {
            console.error('Chat socket closed unexpectedly');
        };

        document.querySelector('#chat-message-input').focus();
        document.querySelector('#chat-message-input').onkeyup = function(e) {
            if (e.keyCode === 13) {  // enter, return
                document.querySelector('#chat-message-submit').click();
            }
        };

        document.querySelector('#chat-message-submit').onclick = function(e) {
            const messageInputDom = document.querySelector('#chat-message-input');
            const message = messageInputDom.value;
            chatSocket.send(JSON.stringify({
                'message': message
            }));
            messageInputDom.value = '';
        };
    </script>
</body>
</html>
项目配置 chat 主路由
# joyoo/urls.py, chat 主路由
from django.conf.urls import include
from django.urls import path
from django.contrib import admin

urlpatterns = [
    path('chat/', include('chat.urls')),
]
chat 配置视图路由
#!/usr/bin/env python3
# -*- coding: utf-8 -*-
# chat/urls.py

"""
@author: yinzhuoqun
@site: http://xieboke.net/
@email: yin@zhuoqun.info
@time: 2020/8/27 10:53
"""

from django.urls import path

from . import views

urlpatterns = [
    path('', views.index, name='index'),
    path('<str:room_name>/', views.room, name='room'),
]
启用 channel layer
信道层是一种通信系统。它允许多个消费者实例彼此交谈,以及与 Django 的其他部分交谈。
通道层提供以下抽象:
通道是一个可以将邮件发送到的邮箱。每个频道都有一个名称。任何拥有频道名称的人都可以向频道发送消息。
一组是一组相关的通道。一个组有一个名称。任何具有组名称的人都可以按名称向组添加/删除频道,并向组中的所有频道发送消息。无法枚举特定组中的通道。
每个使用者实例都有一个自动生成的唯一通道名,因此可以通过通道层进行通信。
在我们的聊天应用程序中,我们希望同一个房间中的多个聊天消费者实例相互通信。为此,我们将让每个聊天消费者将其频道添加到一个组,该组的名称基于房间名称。这将允许聊天用户向同一房间内的所有其他聊天用户发送消息。
我们将使用一个使用 redis 作为后备存储的通道层。要在端口 6379 上启动 Redis 服务器,首先系统上安装 redis,并启动。
源码安装 redis(需要 5.0.x 以上版本): https://xieboke.net/article/23/#_label4
安装 channels_redis
pip install channels_redis -i https://pypi.tuna.tsinghua.edu.cn/simple
配置 CHANNEL_LAYERS
https://channels.readthedocs.io/en/latest/topics/channel_layers.html#redis-channel-layer
# settings.py, Channel Layer
CHANNEL_LAYERS = {
    "default": {
        "BACKEND": "channels_redis.core.RedisChannelLayer",  # pip install channels_redis
        "CONFIG": {
            "hosts": [
                # ("127.0.0.1", 6379),
                "redis://127.0.0.1:6379/3",  # 务必安装 redis 5.0 以上版本(如:5.0.12)
            ],
        },
    },
    # "default": {
    #     "BACKEND": "channels.layers.InMemoryChannelLayer"
    # }
}
chat 新建 consumers.py
相当于 Django 的视图
https://channels.readthedocs.io/en/latest/topics/consumers.html#asyncwebsocketconsumer
#!/usr/bin/env python3
# -*- coding: utf-8 -*-

"""
@author: yinzhuoqun
@site: http://xieboke.net/
@email: yin@zhuoqun.info
@time: 2020/8/27 11:13
"""

import json
from channels.generic.websocket import WebsocketConsumer, AsyncWebsocketConsumer
from channels.layers import get_channel_layer
from asgiref.sync import async_to_sync


class ChatConsumer(WebsocketConsumer):
    def connect(self):
        self.accept()
        self.send(text_data=json.dumps({
            'message': "有什么需要帮助的吗?"
        }))

    def disconnect(self, close_code):
        pass

    def receive(self, text_data):
        text_data_json = json.loads(text_data)
        message = text_data_json['message']
        print(message)

        self.send(text_data=json.dumps({
            'message': message
        }))


class AsyncConsumer(AsyncWebsocketConsumer):
    async def connect(self):  # 连接时触发
        self.room_name = self.scope['url_route']['kwargs']['room_name']
        # 直接从用户指定的房间名称构造 Channels 组名称,不进行任何引用或转义
        self.room_group_name = 'room_%s' % self.room_name
        self.user = self.scope["user"]  # 获取用户信息
        # print(self.user)

        # 将新的连接加入到群组
        await self.channel_layer.group_add(
            self.room_group_name,
            self.channel_name
        )
        # 接受连接
        await self.accept()

        # 欢迎语
        msg = {"content": "👏👏:您来了,随便聊聊", "level": 2}
        await self.send(text_data=json.dumps({
            'message': msg["content"]
        }))

    async def disconnect(self, close_code):  # 断开时触发
        # 将关闭的连接从群组中移除
        await self.channel_layer.group_discard(
            self.room_group_name,
            self.channel_name
        )

    # Receive message from WebSocket
    async def receive(self, text_data=None, bytes_data=None):  # 接收消息时触发
        text_data_json = json.loads(text_data)
        message = text_data_json['message']

        # 信息群发
        await self.channel_layer.group_send(
            self.room_group_name,
            {
                'type': 'system_message',
                'message': message,

            }
        )

    # Receive message from room group
    async def system_message(self, event):
        message = event['message']

        print(self.room_group_name, self.user, message)

        # Send message to WebSocket单发消息
        await self.send(text_data=json.dumps({
            'message': message,

        }))


def send_group_msg(room_name, message):
    # 从Channels的外部发送消息给Channel
    """
    from chat import consumers
    consumers.send_group_msg('joyoo', {'content': '机器硬盘故障', 'level': 1})
    consumers.send_group_msg('joyoo', {'content': '正在安装系统', 'level': 2})
    :param room_name:
    :param message:
    :return:
    """
    channel_layer = get_channel_layer()
    async_to_sync(channel_layer.group_send)(
        'notice_{}'.format(room_name),  # 构造Channels组名称
        {
            "type": "system_message",
            "message": message,
        }
    )
配置 channels ws 主路由
项目目录 joyoo\joyoo\routing.py,相当于 Django app 的主路由
#!/usr/bin/env python3
# -*- coding: utf-8 -*-

"""
@author: yinzhuoqun
@site: http://xieboke.net/
@email: yin@zhuoqun.info
@time: 2020/8/26 16:46
"""

from channels.routing import ProtocolTypeRouter
from channels.auth import AuthMiddlewareStack
from channels.routing import ProtocolTypeRouter, URLRouter
import chat.routing

# 设置默认路由在项目创建routing.py文件
application = ProtocolTypeRouter({
    # Empty for now (http->django views is added by default)
    'websocket': AuthMiddlewareStack(
        URLRouter(
            chat.routing.websocket_urlpatterns
        )
    ),
})
ASGI_APPLICATION 配置
# settings.py
# 设置为指向路由对象作为根应用程序
ASGI_APPLICATION = "joyoo.routing.application"
chat 配置 channels 子路由
相当于 Django app 的子路由
#!/usr/bin/env python3
# -*- coding: utf-8 -*-
# chat/routing.py

"""
@author: yinzhuoqun
@site: http://xieboke.net/
@email: yin@zhuoqun.info
@time: 2020/8/27 11:13
"""

from django.urls import re_path

from . import consumers

websocket_urlpatterns = [
    re_path(r'ws/chat/(?P<room_name>\w+)/$', consumers.ChatConsumer),
    # re_path(r'ws/chat/(?P<room_name>\w+)/$', consumers.AsyncConsumer),  # 异步
]
启动 Django
debug = True 下直接启动 Django,就可以实现实时通讯了
nginx + daphne + channels 部署
主要参考官文:https://channels.readthedocs.io/en/latest/deploying.html
新建 asgi.py
# joyoo/asgi.py,项目目录与 wsgi.py、setings.py 同级
"""
ASGI entrypoint. Configures Django and then runs the application
defined in the ASGI_APPLICATION setting.
"""

import os
import django
from channels.routing import get_default_application

os.environ.setdefault("DJANGO_SETTINGS_MODULE", "joyoo.settings")  # joyoo 为项目名,需要修改成你自己的
django.setup()
application = get_default_application()
安装 daphne
pip install daphne
启动 daphne 和 channels application
daphne -b 0.0.0.0 -p 8001 joyoo.asgi:application
daphne 后台运行可以使用 systemd 或者 supervisor
# supervisor config
[program:daphne]
directory=/root/yzq/djangos/blog
command=/root/.virtualenvs/joyoo/bin/daphne -b 127.0.0.1 -p 8001 --proxy-headers joyoo.asgi:application
autostart=true
autorestart=true
stdout_logfile=/root/yzq/logs/websocket.log
redirect_stderr=true
配置 nginx
在原 Django 的 Server 里增加一个路由转发 location /ws/
https://channels.readthedocs.io/en/latest/deploying.html#alternative-web-servers
...
server {
    ...
    location / {
        try_files $uri @proxy_to_app;
    }
    ...
    location /ws/ {
        proxy_pass http://127.0.0.1:8001;  # 对应 channel 启动端口

        proxy_http_version 1.1;
        proxy_set_header Upgrade $http_upgrade;
        proxy_set_header Connection "upgrade";

        proxy_redirect off;
        proxy_set_header Host $host;
        proxy_set_header X-Real-IP $remote_addr;
        proxy_set_header X-Forwarded-For $proxy_add_x_forwarded_for;
        proxy_set_header X-Forwarded-Host $server_name;
    }
    ...
}
效果动图
体验一下
聊天室实现

文章部分资料可能来源于网络,如有侵权请告知删除。谢谢!
前一篇: Django Channels 2: How Many Users Is In The Specific Room
下一篇: Push.js Javascript(js 浏览器桌面通知)
关于作者
Zhuoyuebiji ( 广东·深圳 )
🚩成长的时候,能帮有需要的你
我是 卓越笔记,软件测试工作者,热爱互联网,喜欢琢磨,遇到问题就一定要找到答案。我的博客主要记录学习中遇到的知识点和遇到的问题及问题的解决方法。欢迎同样热爱互联网的小伙伴们交换友链,一起探索互联网的世界 😊